Bloglovin

Follow on Bloglovin

Thursday, September 4, 2014

RL.4.6 from a Child's Perspective

My fourth grade class has been working on determining point of view, and I just have to share this precious response with you:

It was written in first person 
because the person told the story,
but not behind his back.

I love it!

Here's how we tackled RL.4.6 this year:

  • To understand first- and third-person narratives, students must know about first-, second-, and third-person pronouns. On the first day, we launched into an exploration of pronouns.


  • Next, students viewed a PowerPoint presentation that taught them how to determine point of view. If the excerpt was written in first person, they held up one finger; if it was written in third person, they held up three fingers. (They also had a blast naming the picture books from which the excerpts came!)


  • After quite a bit of guided practice, each student completed two independent worksheets to practice on their own.


  • Once my students proved that they could determine point of view, it was time to watch another PowerPoint presentation. In the true spirit of the Common Core, they learned to write a topic sentence that told the point of view and included the title of the publication. Then they defended their choice by explaining whether any of the characters were narrating. 


  • Next, I provided some guided practice using an excerpt from Swiss Family Robinson.


  • My students were finally ready to determine and defend point of view on their own. We practiced for three days with excerpts from Alice in Wonderland, Huckleberry Finn, and Treasure Island. Each student was able to read a text suitable to his or her own reading level. At first, my students' point of view paragraphs were naive and not very clear, but they improved every day. We read student exemplars and noticed that paragraphs explaining whether the narrator was inside or outside the story provided the strongest defense. 


  • After all of this, I felt confident that my class was ready for assessment. They read an excerpt from The Wizard of Oz, determined its point of view, and defended it in a paragraph.

The Common Core State Standards have changed the way I teach point of view, and I think it's for the better!

Brenda

Sunday, August 31, 2014

Teaching Is Like Riding a Bicycle

Teaching is like riding a bicycle. Once you learn, you'll never forget. Writing a thorough lesson plan gets you up on that bike, rolling down the sidewalk.


New standards provide a framework for excellence in teaching, but in reality, it's just oh-so-easy to pick up that old textbook and teach it from cover to cover. Teacher evaluation programs give us much more specific criteria, but they only assess. What would happen if we coached teachers to create thorough lesson plans and then assessed those showcase lessons? Teaching and learning would improve.

Let's bring back the bicycle analogy. Teaching a child in a school setting is like teaching a child to ride a bicycle:

  1. Objective - We explain the point: "Today you will learn how to ride a bicycle."
  2. Direct Instruction and Modeling - We tell them how to do it and show by doing it ourselves.
  3. Guided Practice - We hold them up and run along beside them while they try it.
  4. Formative Assessment - We ask how it's going. We let go and and see what happens.
  5. Independent Practice - We ask them to do it themselves - - - over and over until they get good at it.
  6. Differentiation - We use strategies to address different rates or ways they learn.
  7. Collaboration - We let them try it with their friends.
  8. Higher Order Thinking Skills - We take them to a new level.
  9. Assessment - We test them out to see if they're ready to venture out on their own.
Using these time-tested strategies is essential to a high score on teacher evaluation rubrics. More importantly, they're essential to good teaching and learning. 

Brenda

Monday, August 25, 2014

My First Year of Teaching

Flash back to 1983. I arrive, young and bright-eyed for my first day of teaching.

What age group and subject(s) were you teaching?  I taught a class of 18 fourth graders.

What was your first classroom like? I remember four light green glazed brick walls. The front wall had a blackboard flanked by two empty bulletin boards. The back wall was totally covered with three large bulletin boards. One side wall had a coat room, a teacher closet, and the door; the other held a big, noisy heater (no air conditioning) and rows of low shelves. Above the shelves were rows of windows with round stickers on their edges. The stickers marked the exact position each window shade had to be at the end of each day (or else you would be written up by the superintendent!) I vividly remember my reaction to that first room: What will I put on all of those empty shelves and bulletin boards???

Technology in my classroom amounted to the chalkboard. That's it. I could borrow a 16 mm film projector (with a big reel of film) or a film strip projector from the library. That fall we were fortunate to receive our first copy machine, and later in the year we got two Apple IIe computers (no software, no Internet...just two computers for which we had to write code.)

Were you given supplies and materials? When I entered the building a few days before school started, the principal handed me a key, a box of chalk, an American flag, and a ream of brown construction paper. He pointed me down the hall to my room, and that was it. Later, after I begged for more supplies, he gave me a pair of ancient scissors, a tape dispenser, and a used plan book. You may think I'm joking, but I'm not.

Fortunately, after a very short amount of time, I was able to order  a limited amount of supplies, such as tape, staples, glue, and more construction paper. The PTO supplied classroom games. I will say, however, that it took years for me to fill the small amount of storage space I had in that classroom. How ironic, when I now wish I had less stuff!

What was the hardest part of your first year of teaching? The hardest part of my first year of teaching was that I didn't really know how to teach or how to manage a classroom. At the time, I felt frustrated, but I really don't think I realized how little I knew.

What was the best part of your first year of teaching? Teaching and learning! Learning and teaching! It was magical!

What do you know now that you wish you knew that first year? Oh my. Nothing. As they say, ignorance is bliss. And education is a journey.

Times have changed. Teaching has changed. I have changed. But I wouldn't change a thing.

Many thanks to Laurah J. of the ESOL Odyssey for prompting this blog.


Brenda

Saturday, August 23, 2014

Six-Word Selfies

My class had a bit of back-to-school fun writing six-word selfies and publishing them Snapchat style. It was easy! I simply asked each child to write a six-word sentence that explained his/her hopes, dreams, goals, or aspirations for the school year. We passed around an iPad, and each student took a selfie. Later, I inserted each child's photo into a PowerPoint presentation, created a gray text box across the middle of the page, and typed in his/her six-word sentence. Here's mine:


These six-word selfies made a wonderful classroom display!

Enjoy!
Brenda

For more classroom activities, links, and freebies, visit my new blog, Enjoy Teaching.

Tuesday, July 29, 2014

Math Facts Baseball

In two weeks, twenty-some bright and shiny faces will appear at the door of my fourth grade classroom, full of anticipation (and sadly, a little rusty due to the long summer vacation). 

Their teacher will be waiting with open arms, knowing that they will soon be hard at work on the dreaded long multiplication algorithm, closely followed by long division. Math Facts Baseball will get them ready!


I developed this game many years ago . . . and have used it every year since. Some of my fellow fourth grade teachers have also picked it up, and it's become a classroom staple for all of us.

The game is relatively simple. Innings can occur every week or every other day, depending on your class's proficiency with the facts. First, students are divided into two teams. Then all players take four 36-fact timed tests (addition, subtraction, multiplication, and division). After the tests are graded, each team lines up to "bat." If a player has passed one test with 100%, he/she gets a single; two tests, a double; three, a triple; or four, a home run. No stealing is allowed, only forced runs. 

As our innings progress, the time for the tests gets shorter. We start with three minutes per test. You might be thinking, "Three minutes for a 36-problem test! That's too long!" Believe me, it's not too long for students coming off of summer vacation. They are really rusty! After three innings, we go down to two minutes, and for the final three innings, they only get one minute per test.

This game is motivational and fun, but like any other facts testing method, it can't be used in isolation. By third or fourth grade, most students know their addition and subtraction facts reasonably well. And once they know their multiplication facts, division easily follows. For these reasons, multiplication facts must be emphasized before and between innings of Math Facts Baseball.

It took me decades to get to this point, but I now believe that learning multiplication facts is easy. And I think that almost all fourth graders can do it. In the end, it all boils down to learning three facts. Here's why:

There are exactly 36 multiplication facts for factors of two through nine:
2x2, 2x3, 2x4, 2x5, 2x6, 2x7, 2x8, 2x9
3x3, 3x4, 3x5, 3x6, 3x7, 3x8, 3x9
4x4, 4x5, 4x6, 4x7, 4x8, 4x9
5x5, 5x6, 5x7, 5x8, 5x9
6x6, 6x7, 6x8, 6x9
7x7, 7x8, 7x9
8x8, 8x9
9x9

Most kids in intermediate grades know their twos and fives. If you subtract facts with factors of two or five, you're left with 21 facts.

Simple processes like skip counting make learning threes and fours relatively easy. Now you're left with ten facts. 

It's time to tackle the nines. Since nine is just one less than ten, a funny thing happens when you multiply by nine: the tens place goes up by one, and the ones place goes down by one. Have you ever noticed that the tens place is one less than the number you're multiplying and that the sum of the two digits always equals nine? This can be used to help students learn their nines. (For example: 3 x 9 = 27. See how 2 is one less than 3, and 2 + 7 = 9?) Guess what? Only six facts left.

Six facts. Seriously. If a student knows his twos, threes, fours, fives, and nines, only six facts remain.

Two of those can be learned by rhyming. Six times six is thirty-six, and six times eight is forty eight.

One more can be learned through a sequence: 5-6-7-8 (or 56 = 7 x 8). Three facts left. 

It's time to memorize. 6 x 7 = 42. 7 x 7 = 49. 8 x 8 = 64. That's it. Done!

If you'd like to present this idea to students, parents, or disbelieving colleagues, try this video from Math Playground. It explains it well.

Two programs on Multiplication.com powerfully support our quest toward mastery. Quick Flash II ensures that each student knows all fact sets. Fact Navigator generates a 36-question test then records time and accuracy. (Click Check Your Progress with Quiz then on 9x9.) Because the student can self-monitor and take the test over and over again, it improves accuracy and fluency better than anything I've ever used. I highly recommend using these free programs!

As those bright and shiny faces appear at my classroom door, I feel confident that each and every one of them can and will master their facts in five short weeks. Strategic teaching of 36 facts, free products from Multiplication.com, and Math Facts Baseball will make it happen.

Batter up!
Brenda

Wednesday, July 23, 2014

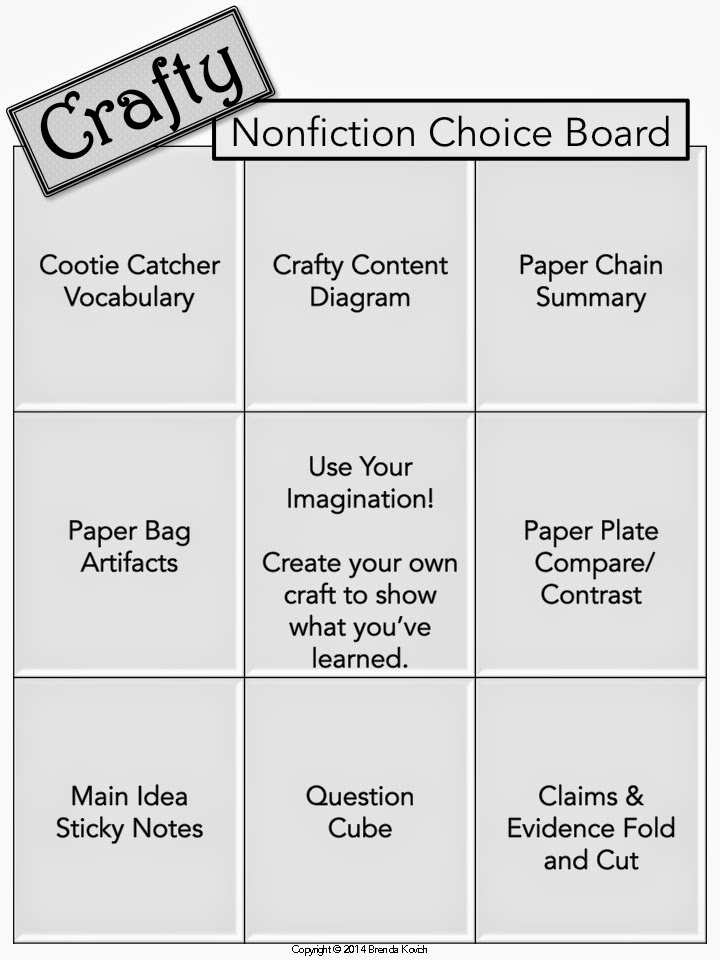
Crafty Nonfiction Choice Boards

This year, I'm asking my students to read one nonfiction picture book each week. To make it more engaging, I decided to develop a choice board. Not your everyday run-of-the-mill choice board, but something really crafty!

informational text
(Available free at my Teachers pay Teachers store. Just click!)

My students will select one activity for each week of the first quarter. The choice board may also be used as an anchor, tic-tac-toe, or single choice activity. I purposefully left the directions rather open-ended to force kids to think about what they might do. This brings some creative and critical thinking into the picture. Two students may come up with widely diverse projects for the same square!

I couldn't wait to get started on these projects . . . so I decided to try them myself. Check out these pictures and instructions. I had so much fun!

vocabulary fortune teller

Cootie Catcher Vocabulary - Choose four key vocabulary words from the text. For each word, find two good synonyms. Build a cootie catcher. (Directions and pictures are easy to find on the Internet.) Write the vocabulary words on the outside squares and the small triangles. On the inside, write four facts that link the vocabulary words. (CCSS RI.3.4, RI.4.4)

volcanoes

Crafty Content Diagram  - Think about the main idea or structure of the book. Use construction paper to build a diagram that explains it to others. (CCSS RI.3.2, RI.4.2)


Paper Chain Summary - Cut strips of construction paper. Write one main concept or event from the book on each strip. Link them together (in order) to form a paper chain. (CCSS RI.3.2, RI.4.2)


Paper Bag Artifacts - Think about physical artifacts that would allow others to experience facts and ideas from the book. Decorate a paper bag and place at least eight items inside.

paper plate Venn diagram compare and contrast comparing and contrasting RI.3.9 RI 4.9

Paper Plate Compare/Contrast - You'll need to read two books with similar content for this activity. Connect two paper plates so that half of one plate overlaps the other. Write similarities between the books on the overlapping part and differences on the non-overlapping parts. (CCSS RI.3.9, RI.4.9)


Main Idea Sticky Notes  - Write the key ideas, principles, or events from the text on sticky notes. What main idea do these support? Stick the notes around the edge of a large index card and write the main idea in the middle. (CCSS RI.3.2, RI.4.2)


Question Cube - Think of three explaining questions and three inferring questions for the text. Write them on the squares of the question cube template. Cut around the edges, fold, and tape together. (CCSS RI.3.1, RI.4.1)


Claims and Evidence Fold and Cut - Fold a piece of construction paper in half lengthwise. Measure and cut the front only to form three (or four) flaps. On the inside, write three (or four) claims the author made, one under each flap. now cut each of the front sections into three strips. On the front, write three pieces of evidence, one on each strip, that the author used to support the claim that appears beneath them. (CCSS RI.4.8)

Enjoy!
Brenda

Tuesday, July 22, 2014

Back-to-School Night Quote

"Education is a shared commitment between dedicated teachers, motivated students, and enthusiastic parents with high expectations." ~Bob Beauprez

I couldn't have said it any better. This quote will definitely make an appearance at my parent orientation meeting this year!

three-legged stool analogy parent support at school

I'll use the quote with this analogy. In order for a three-legged stool to stand, it needs support from all three legs. Enough said!

The countdown to a new school year has begun! Isn't it exciting?

Brenda